Why Use MySQL Workbench?
MySQL Workbench is a powerful tool that helps you work with MySQL databases easily. It gives you a user-friendly interface to create, manage, and organize your databases. You can design tables, write queries, and check your data visually. It also helps you find and fix errors quickly.
Why Use MySQL Workbench When phpMyAdmin is Available?
Many people ask, “If phpMyAdmin is already available, why do we need MySQL Workbench?” It’s a good question — both tools are used to work with MySQL databases, but they serve different needs and offer different features.
I gave you a simple example so you can understand it easily and remember the difference.
PhpMyAdmin
This is like using plastic toy tools — light, simple, and fun!
– You open it in your browser.
– You can click around and do things like:
– Add a new house (table)
– Put people in the house (insert data)
– Look at who lives where (select data)
It’s perfect if you’re just starting out or building something small.
MySQL Workbench
This is like having a real engineer’s toolbox with power tools and a full blueprint station! 💻
– It’s a desktop app you install on your computer.
– It lets you design the whole city — even draw maps (ER diagrams).
– You can do powerful stuff like:
– See how everything connects together visually
– Analyze performance (make things faster!)
– Fix problems quickly with smart tools
– Plan your database before even building it!
In short:
– if you’re building a sandcastle, phpMyAdmin is enough.
– But if you’re building a real castle with rooms, windows, and guards — you need MySQL Workbench.
Both are useful — choose based on your project needs.
In this blog, I’ll share some basic things you need to know to get started with MySQL Workbench. You’ll learn how to connect to a database, create a table, insert data, import data, and export data. If you’re new to databases, Workbench makes learning much easier with its clean layout and helpful features.
Set up MySQL Workbench
– If you’re using Ubuntu, open Ubuntu Software, search for MySQL Workbench, and you’ll see it in the list. Click on it, then click Install to begin the installation.

- Click on this to create a new connection
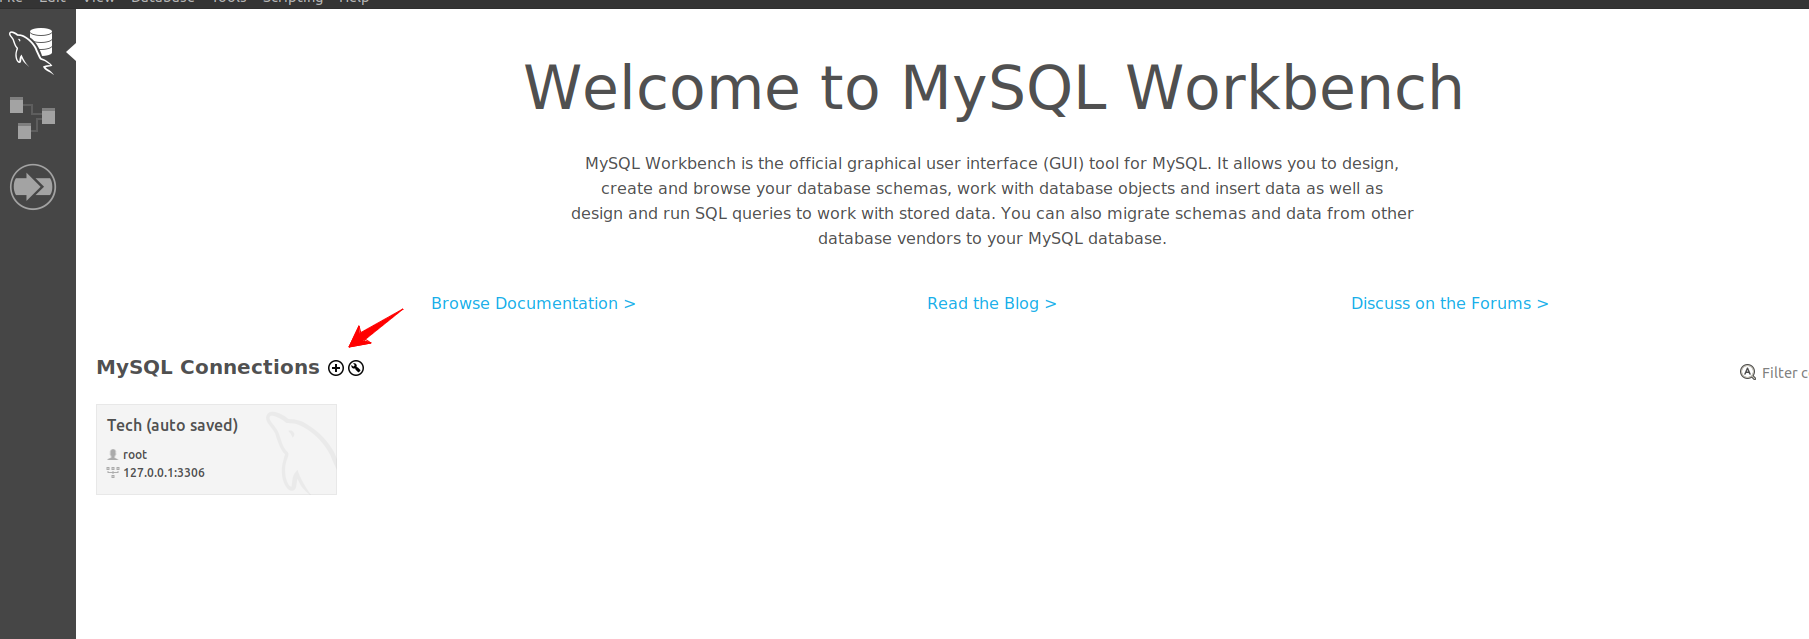
- write the name of the connection. In my case, I named the connection ‘Tech’.”

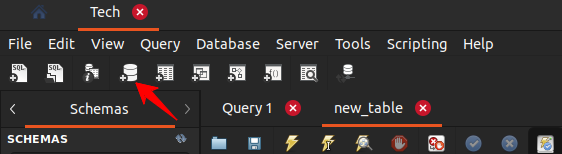
- Now, click on this database icon and create the new schema or database
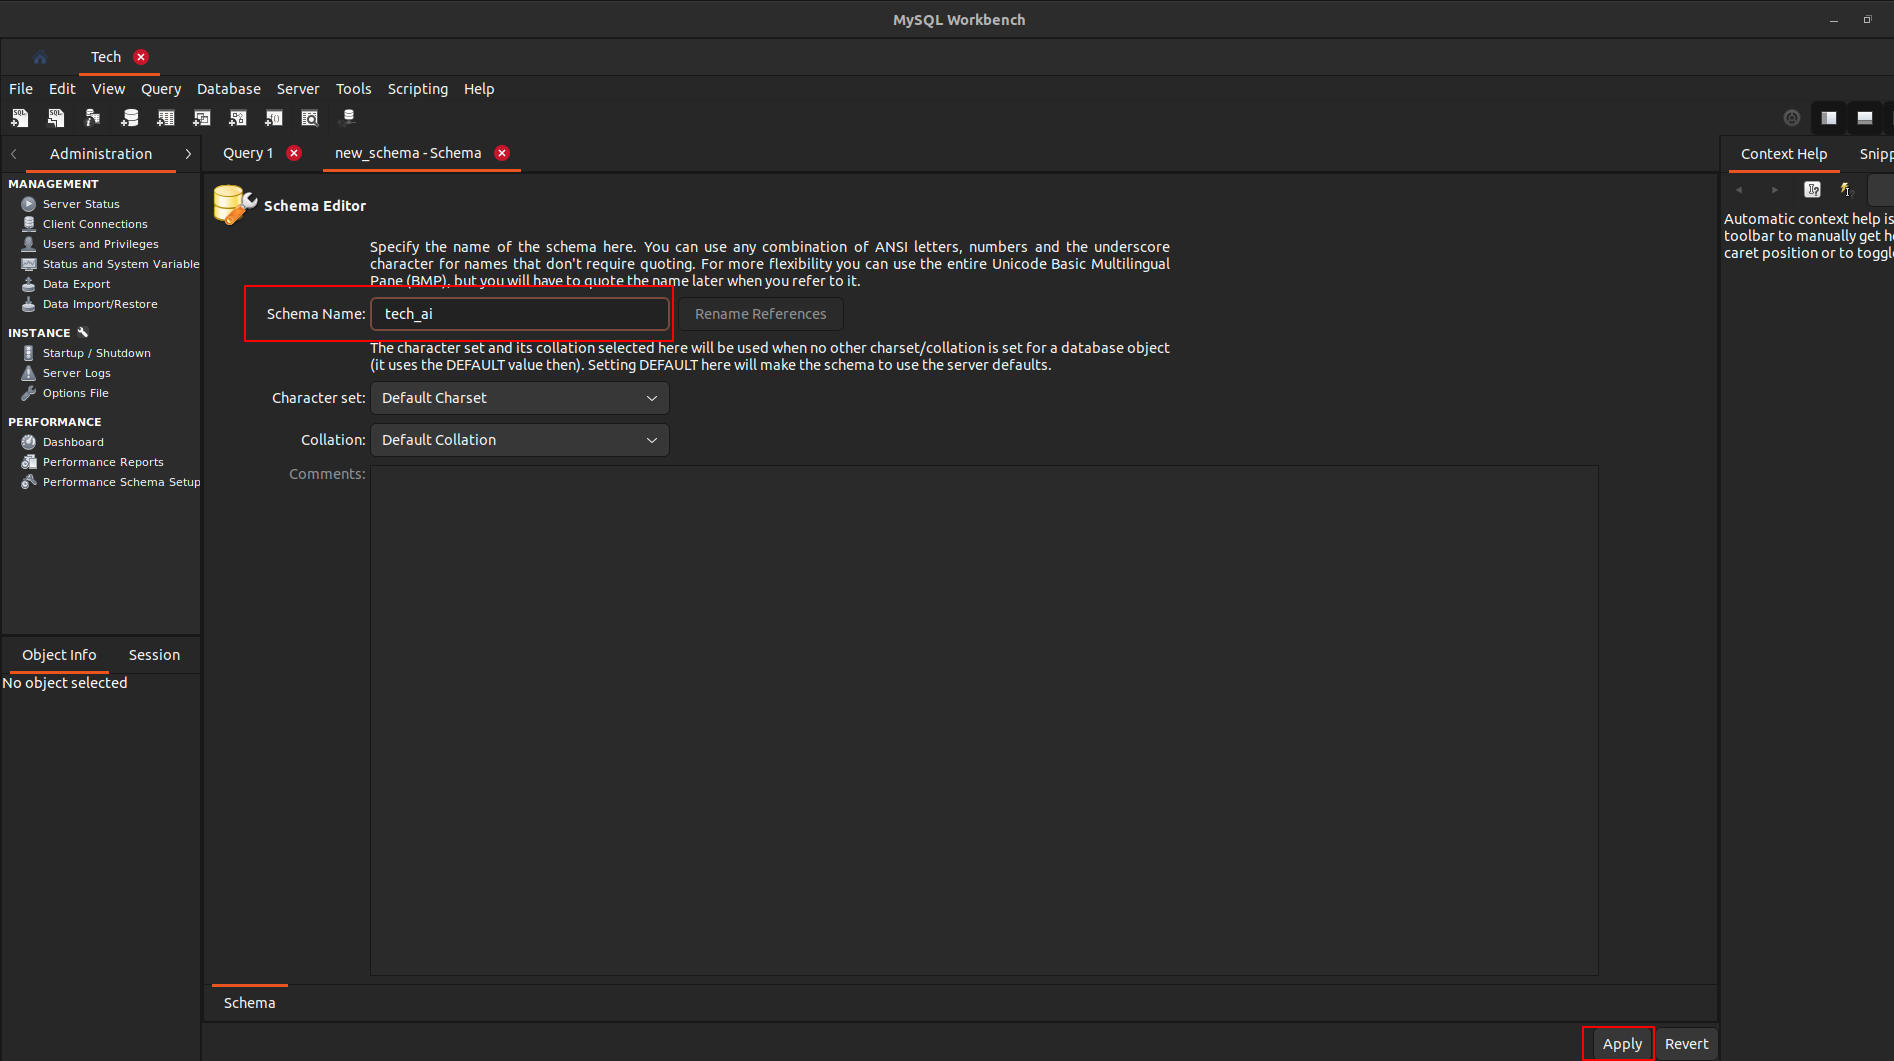
- When you click, you’ll see a new screen. Enter your database name, then click Apply. A popup will appear—click Apply again. Your database will be created successfully.
- If you want to create table, click on this icon and create the table
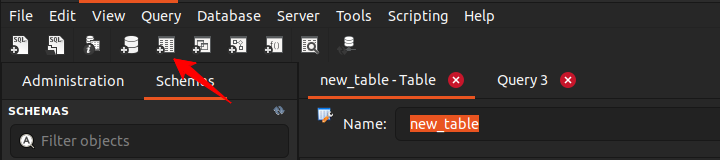
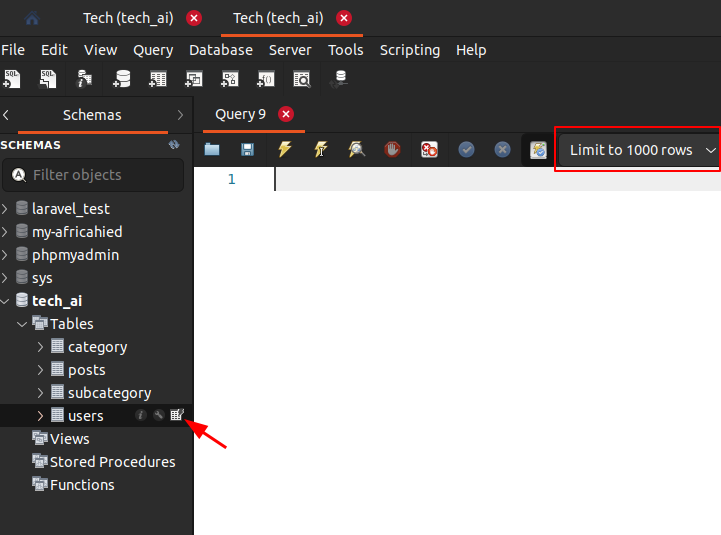
- To view all rows in the table, click the table icon, then adjust the row limit by clicking on ‘Limit’.
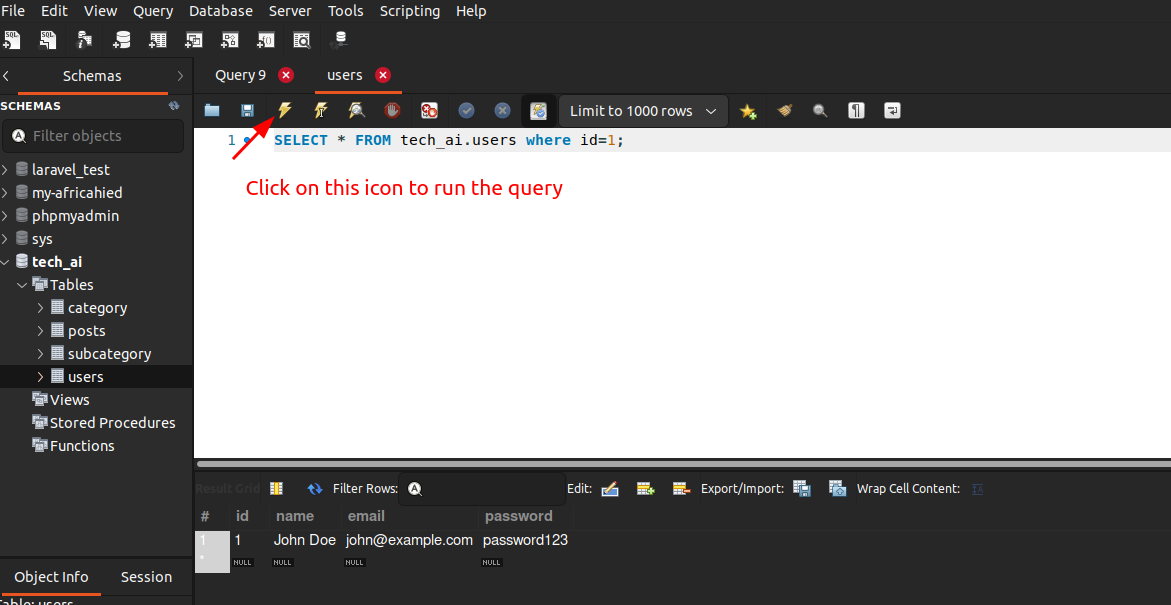
After writing the query, click this icon to run it.
Import & Export
Data Import
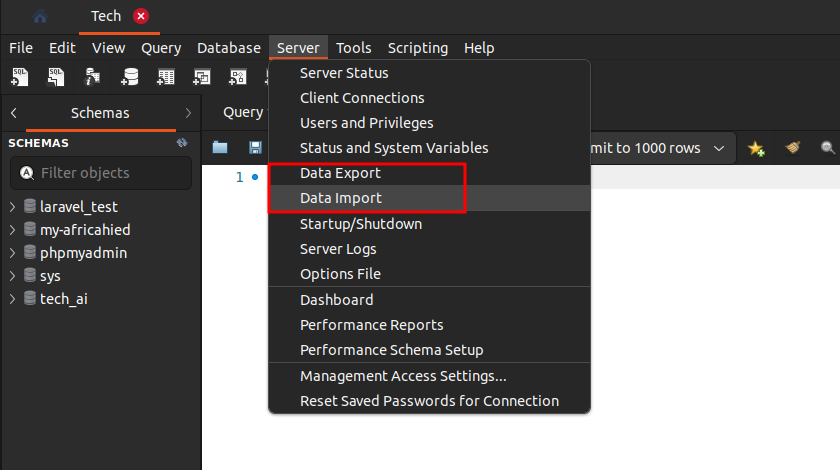
- Go to the Menu Bar:
- Click Server → Data Import
If you add any .sql file to your data, follow these steps
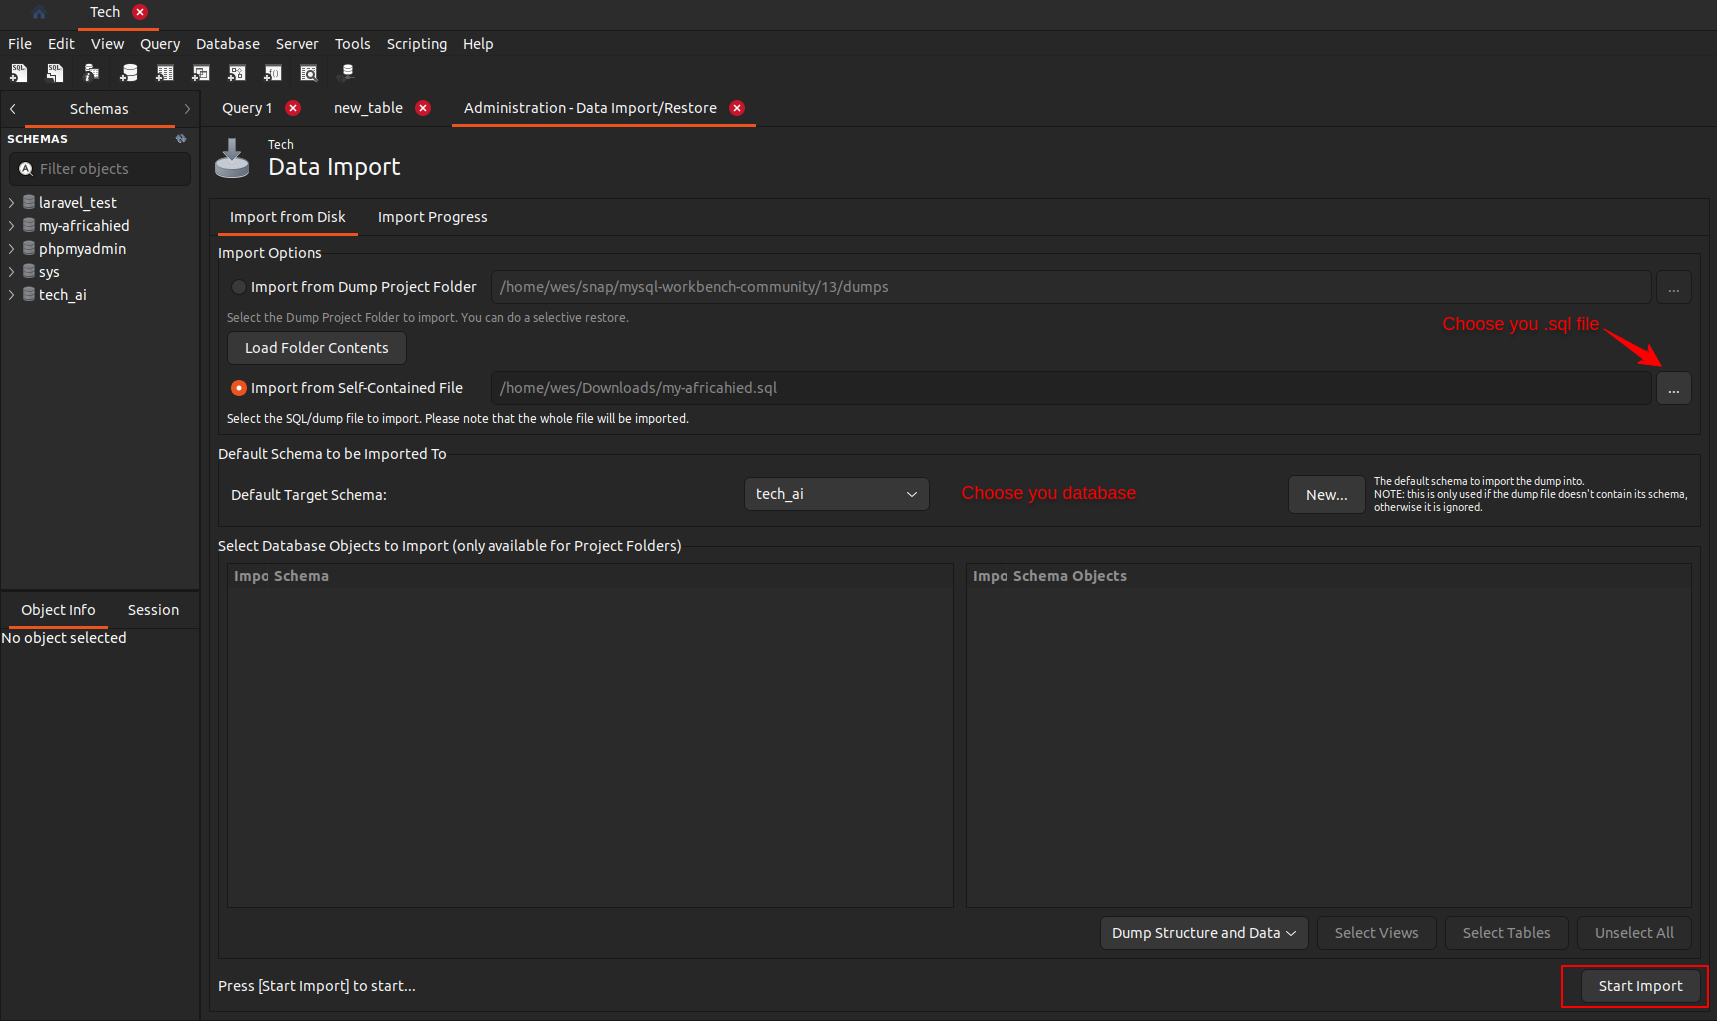
Step 1: Choose data import option
Step 2: choose .sql file and click on the start import button
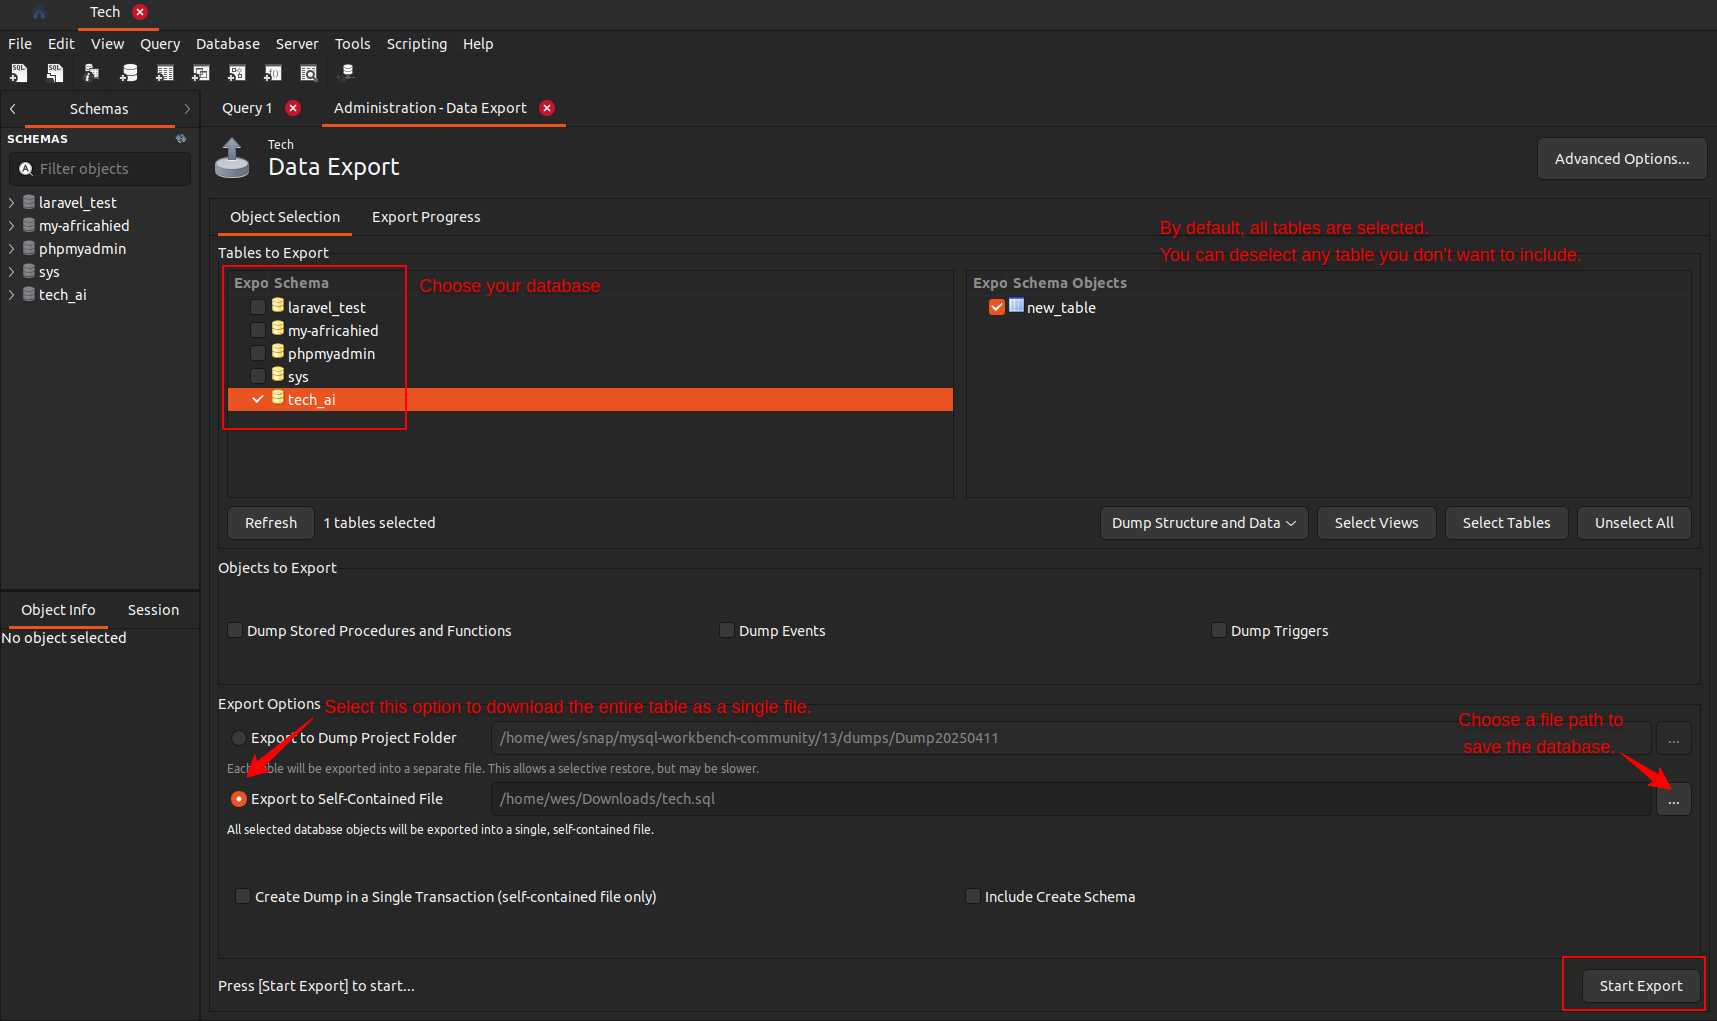
Data Export
Choose your database, and create empty .SQL file where you wan to download the file
Reverser engineering
Reverse engineering in MySQL Workbench lets you create an ER diagram from your existing database.
- Go to the Menu Bar:
- Click Database → Reverse Engineer

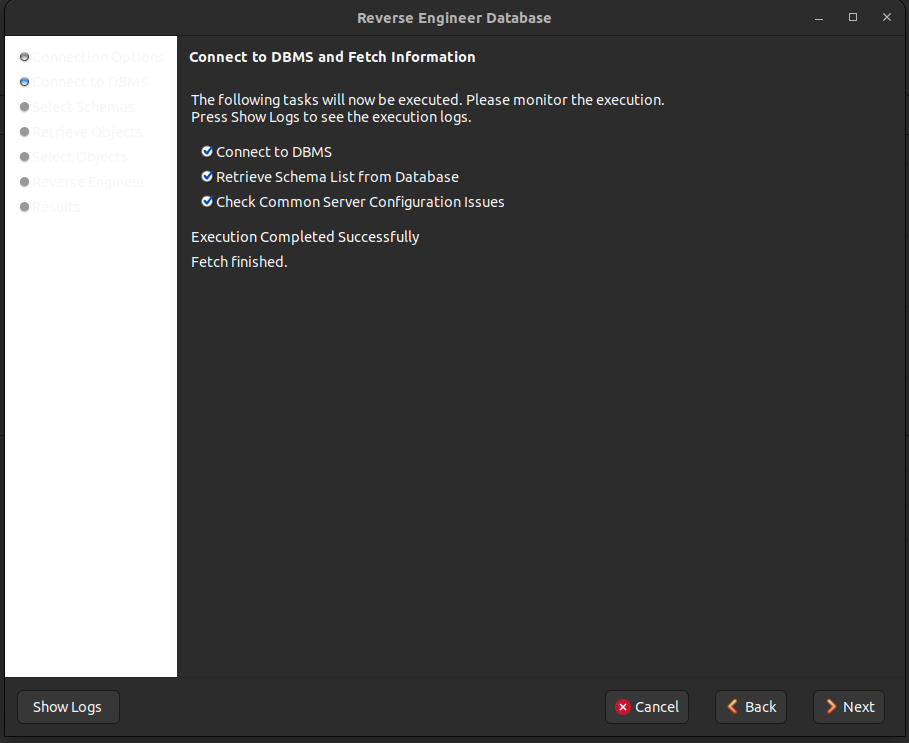
- Connect to a Database:
- Select your MySQL connection or create a new one.
- Click Next.
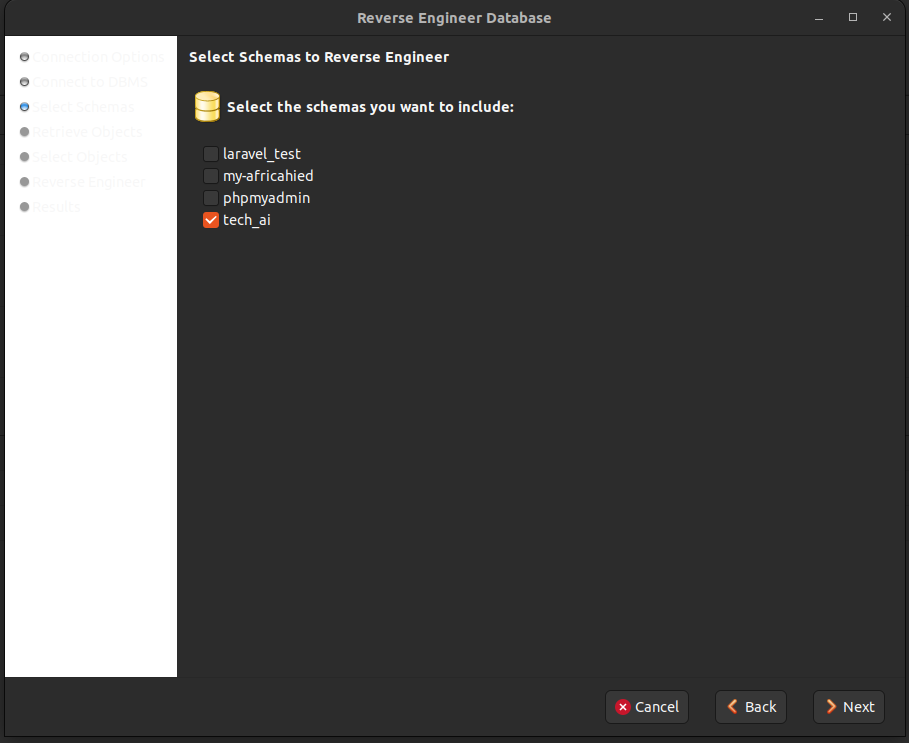
- Select the Schema:
- Choose the schema (database) you want to reverse engineer.
- Click Next.
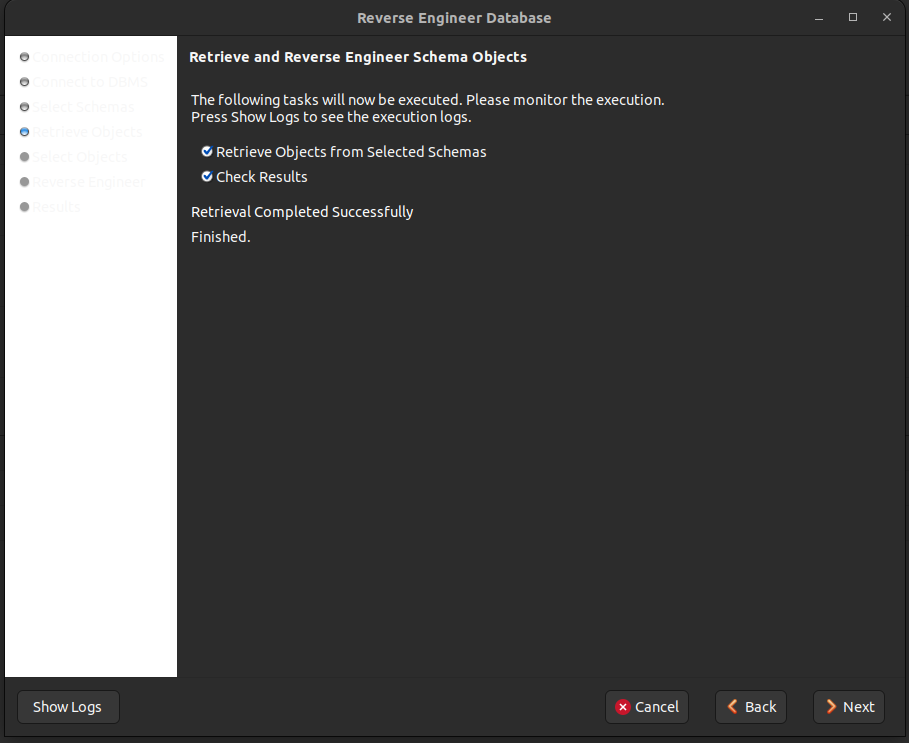
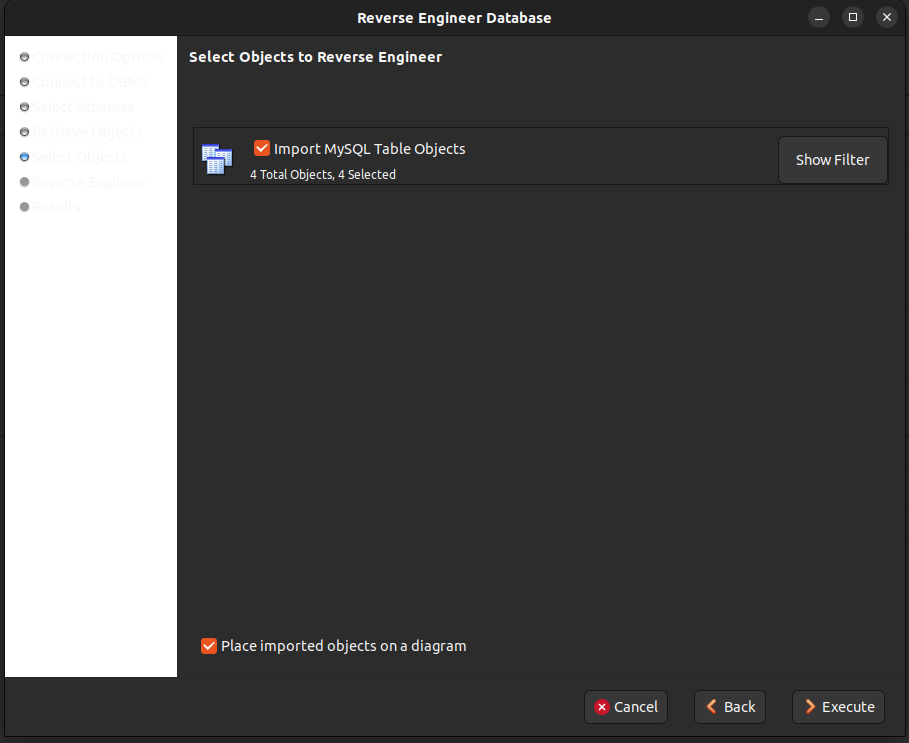
Retrieve Schema Objects:
- MySQL Workbench will analyze the database and show the list of objects.
- Keep all selected and click Execute.
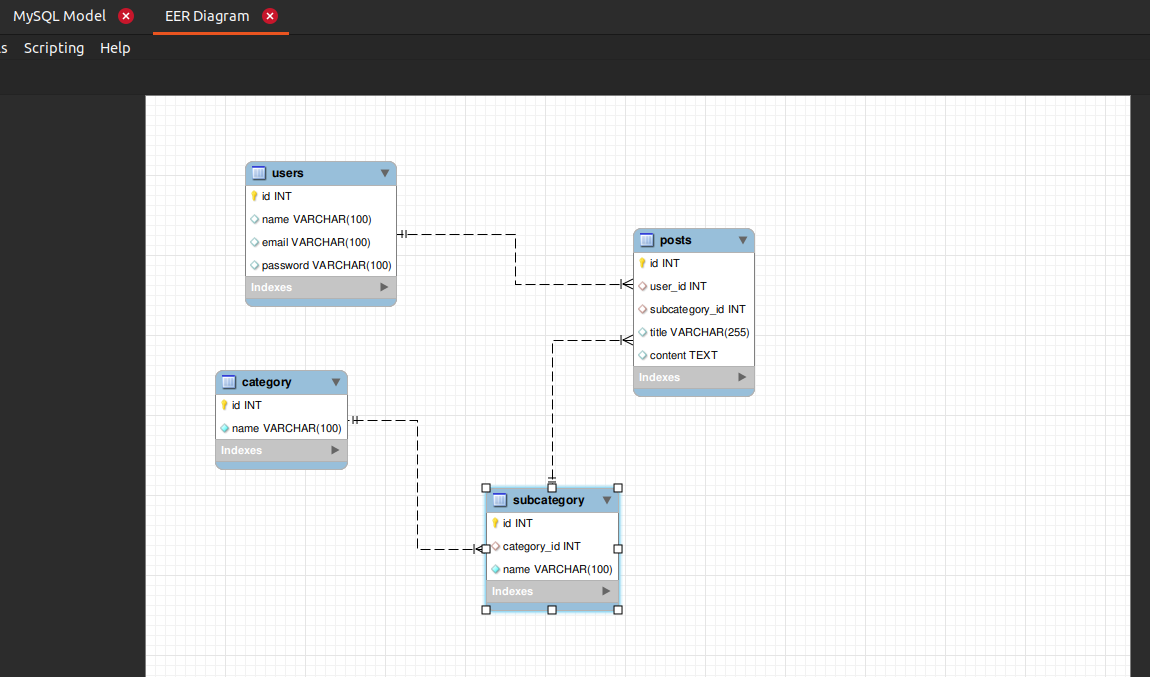
View the ER Diagram:
Save and Export the Diagram:
Click File → Export → Export as PNG/SVG/PDF.
Bonus Tip:
In the ER Diagram (Reverse Engineering) view, after generating your diagram:
- Use the “Arrange → Auto Layout” option to organize your tables nicely.
- You can right-click any table and choose “Edit Table” to see fields and foreign keys visually.
For more insightful tutorials, visit our Tech Blogs and explore the latest in Laravel, AI, and Vue.js development!